


First Attempt at Frame Glue Up Fail
Well, the first try at gluing up a frame ended in failure. The mistake I made was trying to glue too many parts at the same time in order to avoid wasting resin. In this case the amount of resin was fairly small so the end result made the effort to save resin even more troublesome.
So the event went like this. Frame 6 was going to be my first attempt to glue up. Readers will recall that each frame joint consists of the main frame parts, a filler block , and two gussets. I didnt want to try and glue all of this together at the same time because there were two many parts to control and clamp. My thinking was that I would edge glue the two main frame parts and the filler block together, let that epoxy cure, clean it up, and then glue one of the gussets over that joint. I figured that the amount of epoxy needed for the edge gluing was smaller than the minimum amount I could measure and mix, so to save resin, I would edge glue both frame joints at the same time.
I knew that I would need to clamp the filler block in position to keep it from moving. And I assumed I could keep the frame parts from moving by using nails through them into the layup board. I intended to add a cinder block on top of this to hold everything flat. I would use the same approach on the other end of the frame.Here is the setup I came up with.
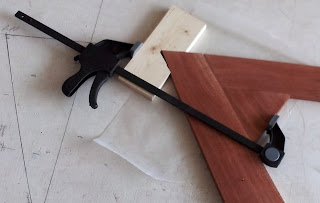
I proceeded to mix up the resin and apply it to the edges of the first joint and nailed the frame parts into position. Then I applied resin to the edges of the filler block and put it into position.I took a clamp and lightly clamped the filler block into position, just enough to hold it there.
I performed the same operation on the second joint. Then laid wax paper over each joint, a small board over the wax paper, and then a cinder block over each joint to hold it flat. Finally I slightly tightened up the clamps (mainly because they felt loose to me). Little did I know that the clamping forced the filler block (which youll notice is wedge shaped) to move the frame parts slightly. I left everything to cure until this morning.
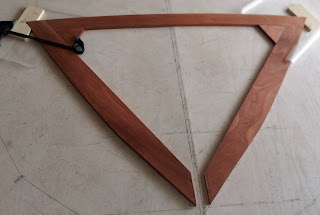
This is what I found.
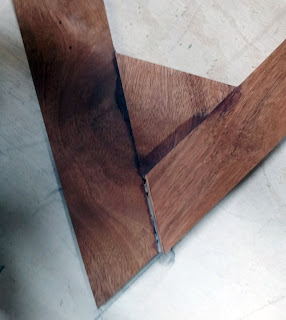
See how the filler block forced the edges out of alignment on both corners of the frame assembly. Youll also notice that there is a sizable gap in the first photo. Finally, there was glue that ran over the edge of the parts to fill in gaps in height. This is because I glued up both ends of the frame at the same time and the cinder blocks were not heavy enough individually to force the parts to lie completely flat.
One other result of this movement was that one of the frame parts was forced out of alignment with the layup marks on the layup board. This wasnt immediately apparent to me yesterday because the nail was holding the frame part in position. When I removed the nail, the frame part moved 1/8" off the line. You can see this on the top part in the following picture. That long edge should be right on the line but it is shifted away.

Well, needless to say, I was disappointed in this first attempt. I went through all the normal human emotions: denial, anger, denial, thinking I could live with the mistake, acceptance of the problem, and finally resolve to correct the parts. So I spent some time looking over the movement and determined that careful cutting apart of the frame joints should yield repairable frame components. Worst case, I thought, would be that I would have to remake these parts. This was why I originally chose frame 6, because it was the smallest of the frames, and therefore the easiest to remake if needed.
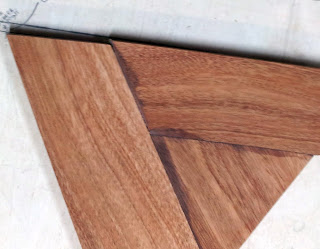
Anyway I cut the parts apart at certain joints and left others intact. I then cleaned up all the glue and slightly ragged edges (from cutting). Here are the parts after that operation. The filler block is still attached to the top part, it was okay.

The plan for the next attempt is to do one side at a time, use two cinder blocks for weight, and not use the clamp on the filler block. The parts to be glued up first are the top two parts in the previous photo. There is no need for the clamp because the filler block is still attached. I will glue this up and let it cure.
Then I plan on edge gluing the other frame side piece into position without the filler block. Once thats cured, only then I will glue the second filler block in place. At that point, I can safely use the clamp to hold the second filler block in position.
So in the next blog article, I will let you know how it came out. But the lesson learned here is to not try and glue more than two parts together in the same assembly at the same time. Ad double check all assembly after its together to make sure everything is still okay.
Until next time, cheers.
Subscribe to:
Post Comments (Atom)

0 comments:
Post a Comment